Instructions for downloading audio files to Apple® devices
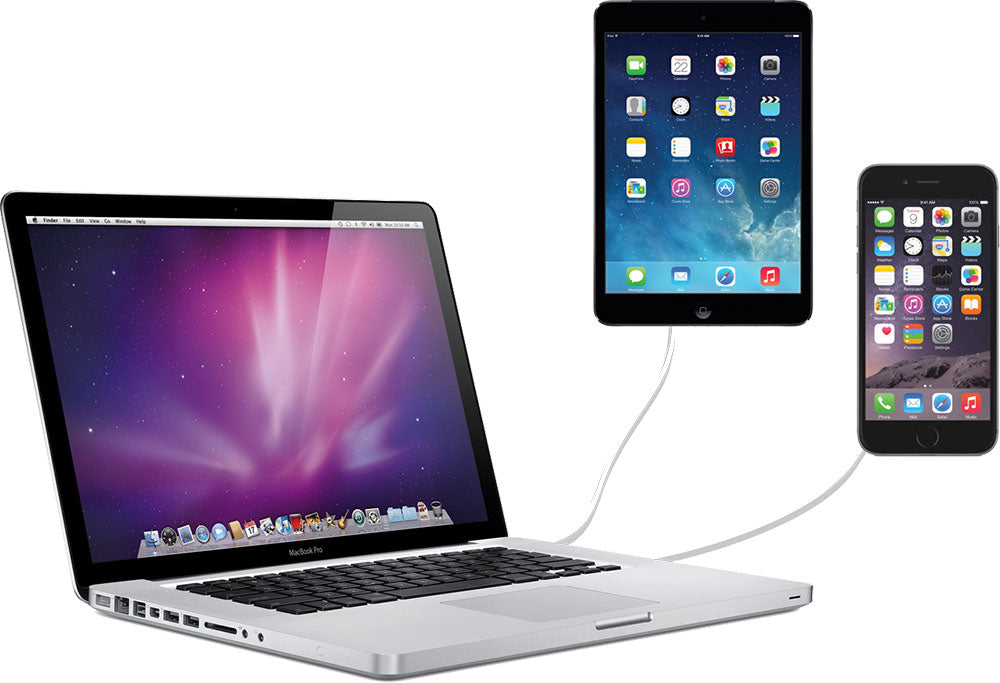
Warning: Due to iTunes® licensing limitations, iPhone® and iPad® users must download audio files to a desktop computer first and then sync with their mobile device. Please follow the instructions below to upload non-iTunes audio files to iPhones®, iPads® and Apple® devices.
First Plug your iPhone® or iPad® into your desktop computer.
Step 1
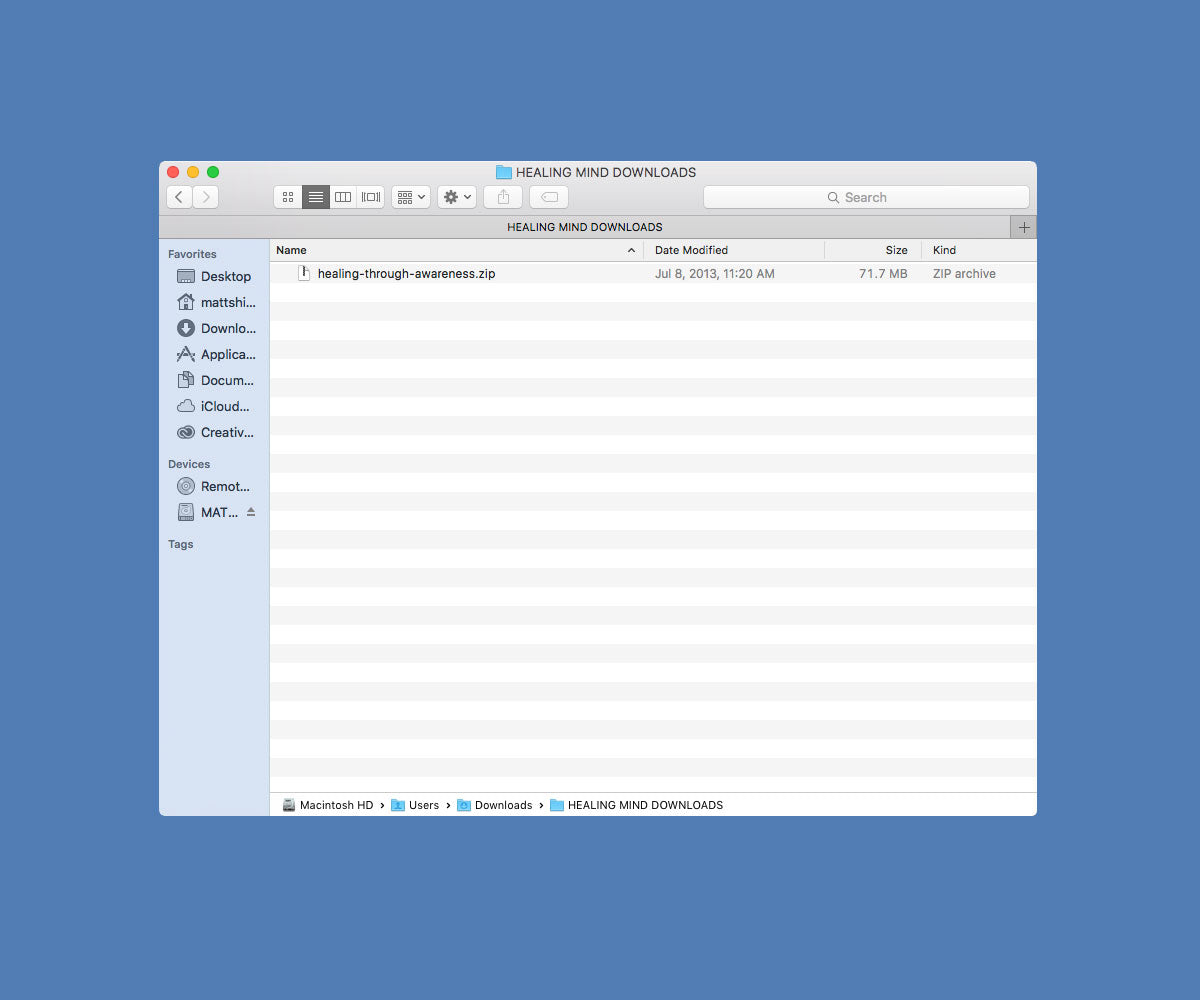
Apple® device users will need to download their audio file to a desktop computer. The file will be downloaded in .ZIP format.
Step 2
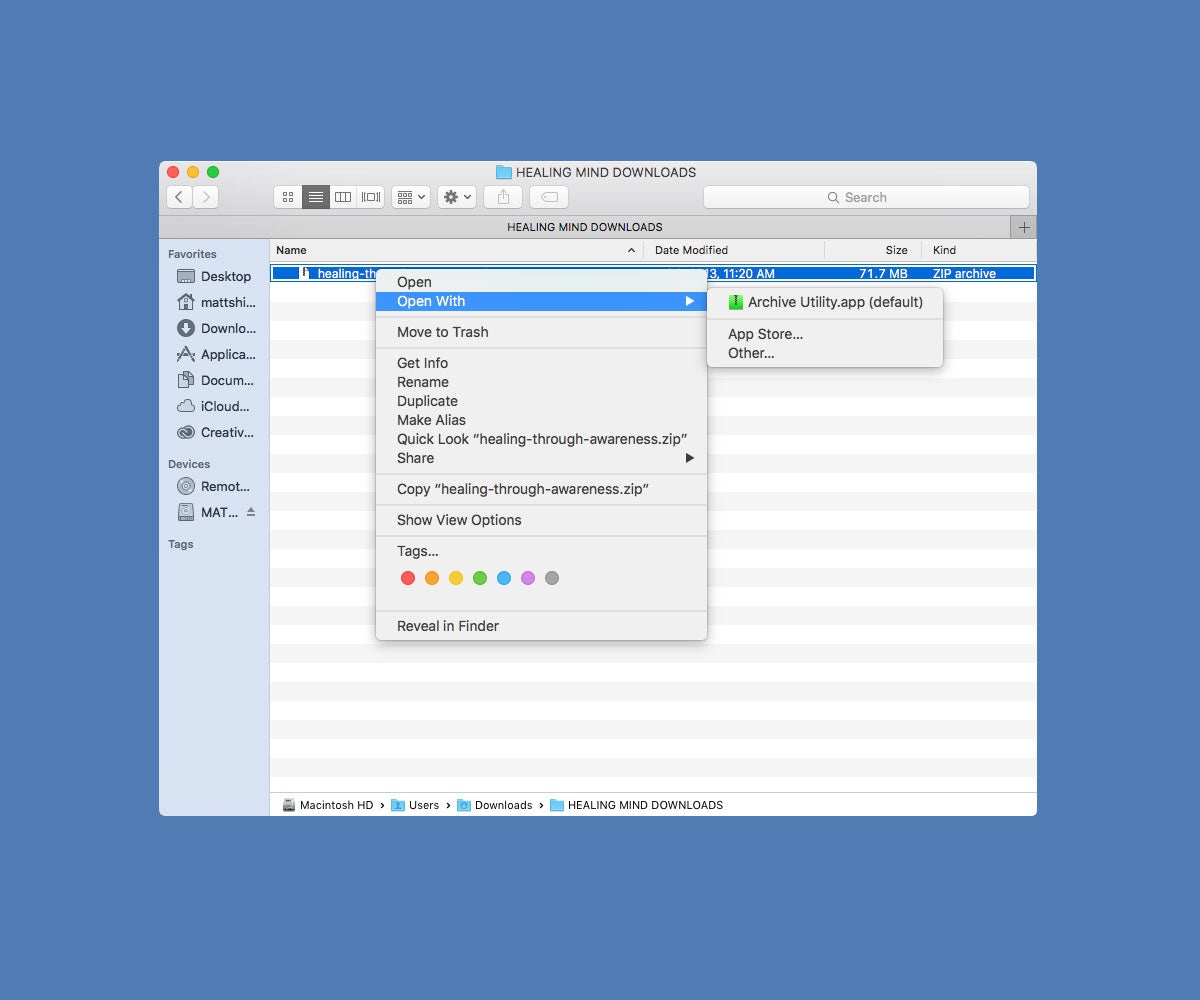
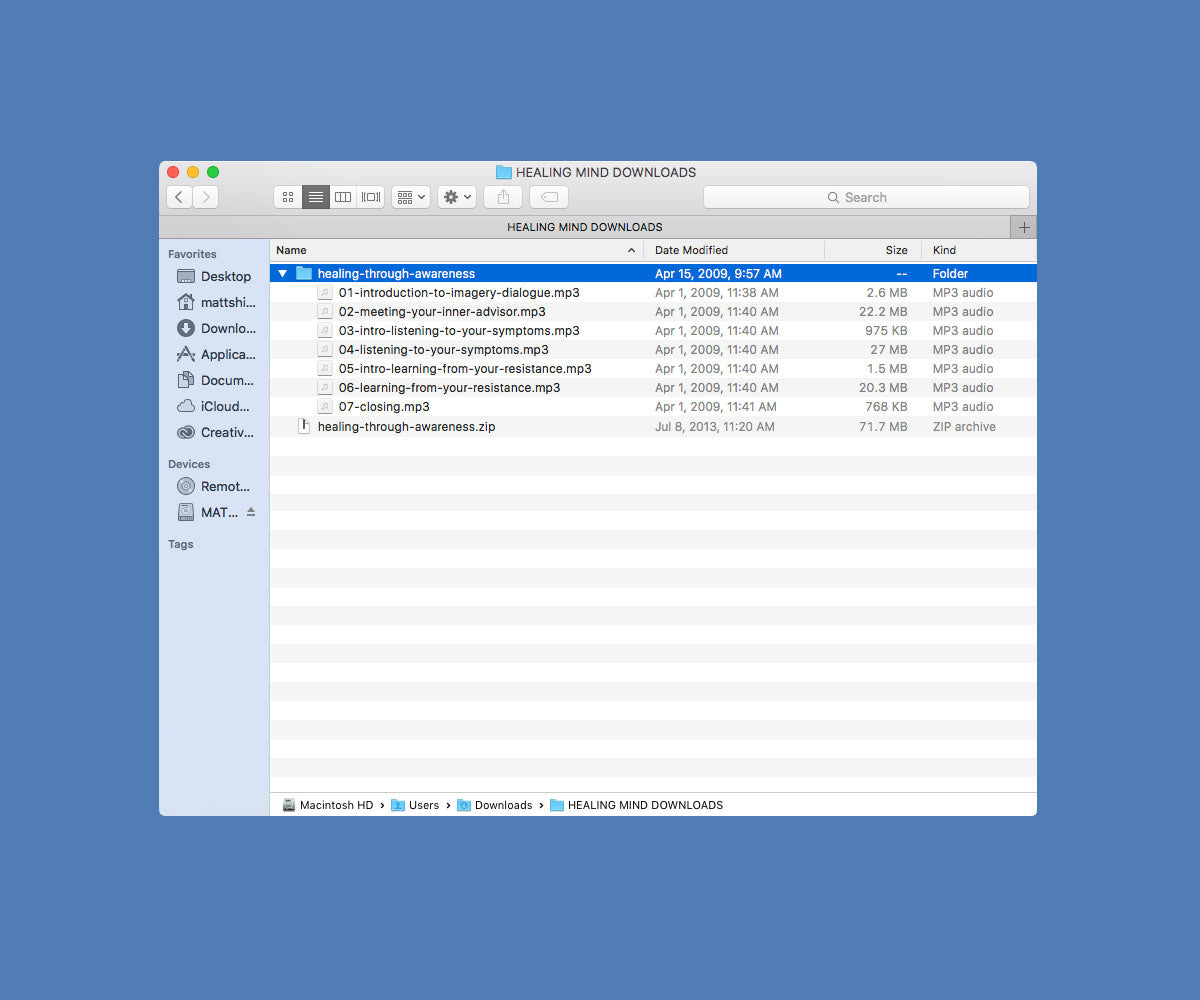
.ZIP files need to opened or "extracted". On Apple® computers you can double click on the file or right click to open with the default "Archive Utility". On PC computers right click and select "Extract All".
Step 3
After opening or "extracting" the audio files contained within the .ZIP folder, they should be visible as shown.
Step 4
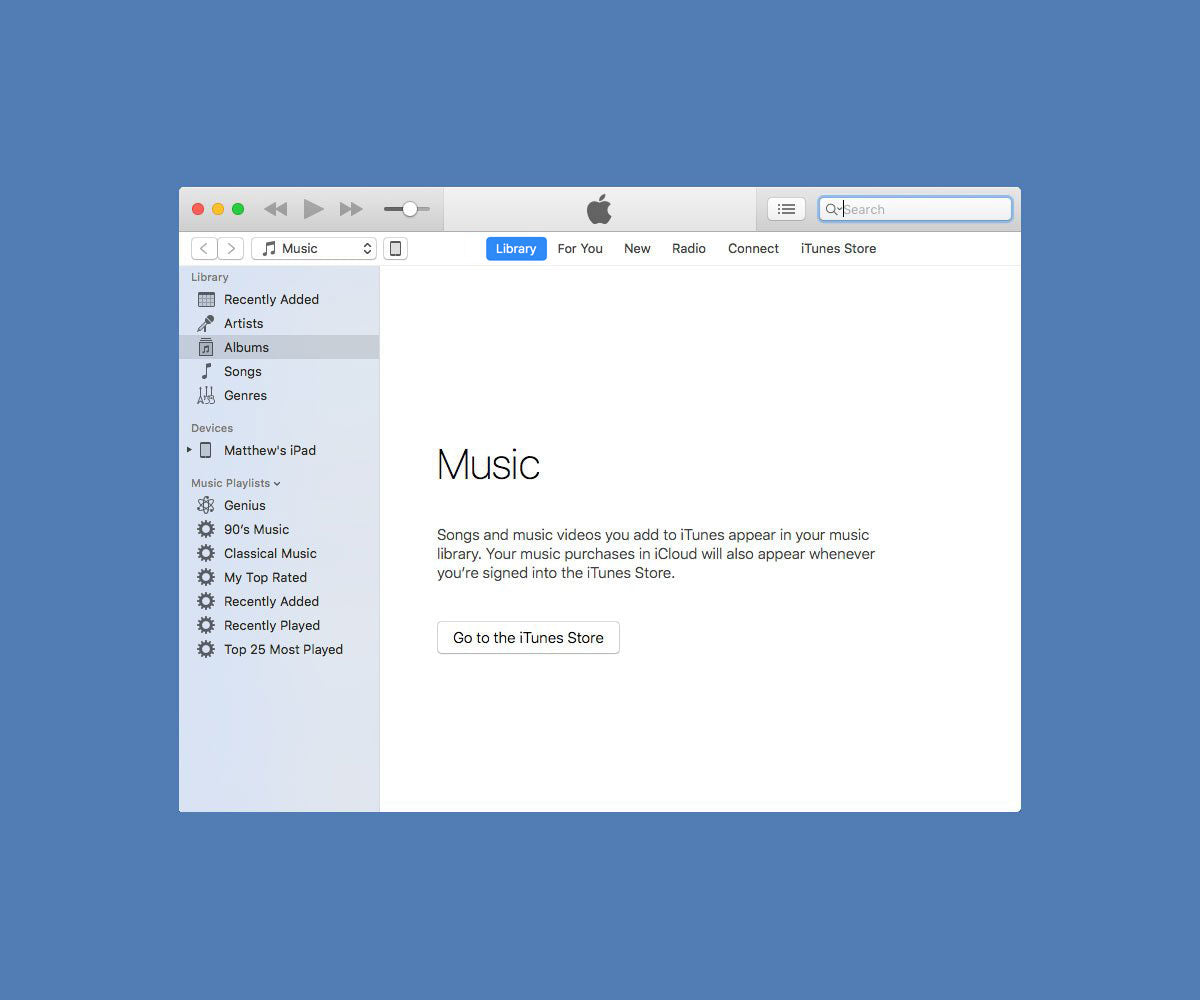
Open the iTunes® program on your Apple® or PC computer. Once you have opened iTunes®, click on the "Library" tab. You will need to drag the files you just extracted into the "Library" tab within iTunes®.
Step 5
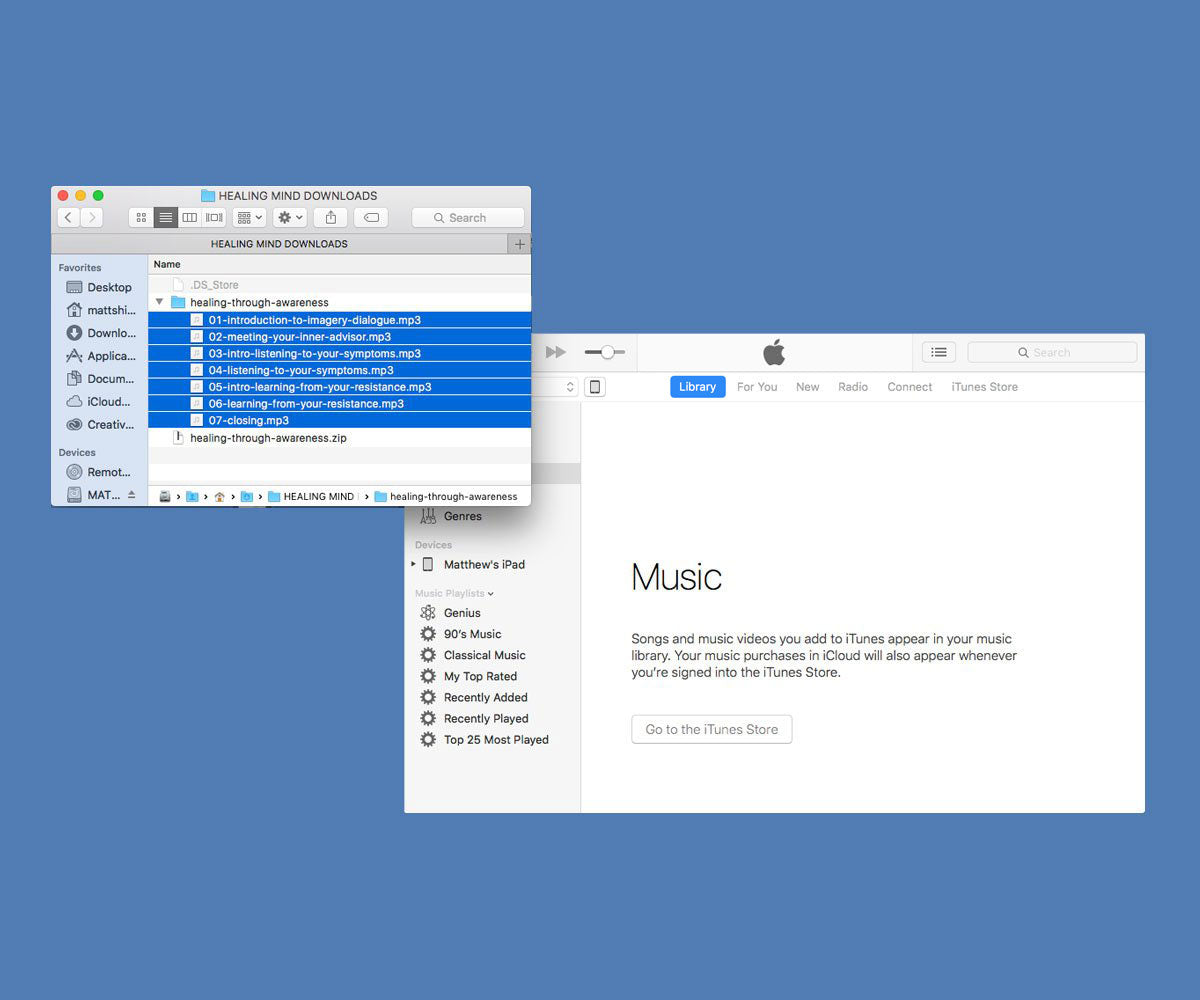
Select all of the files from the extracted folder and drag them into the "Library" section of iTunes®
Step 6
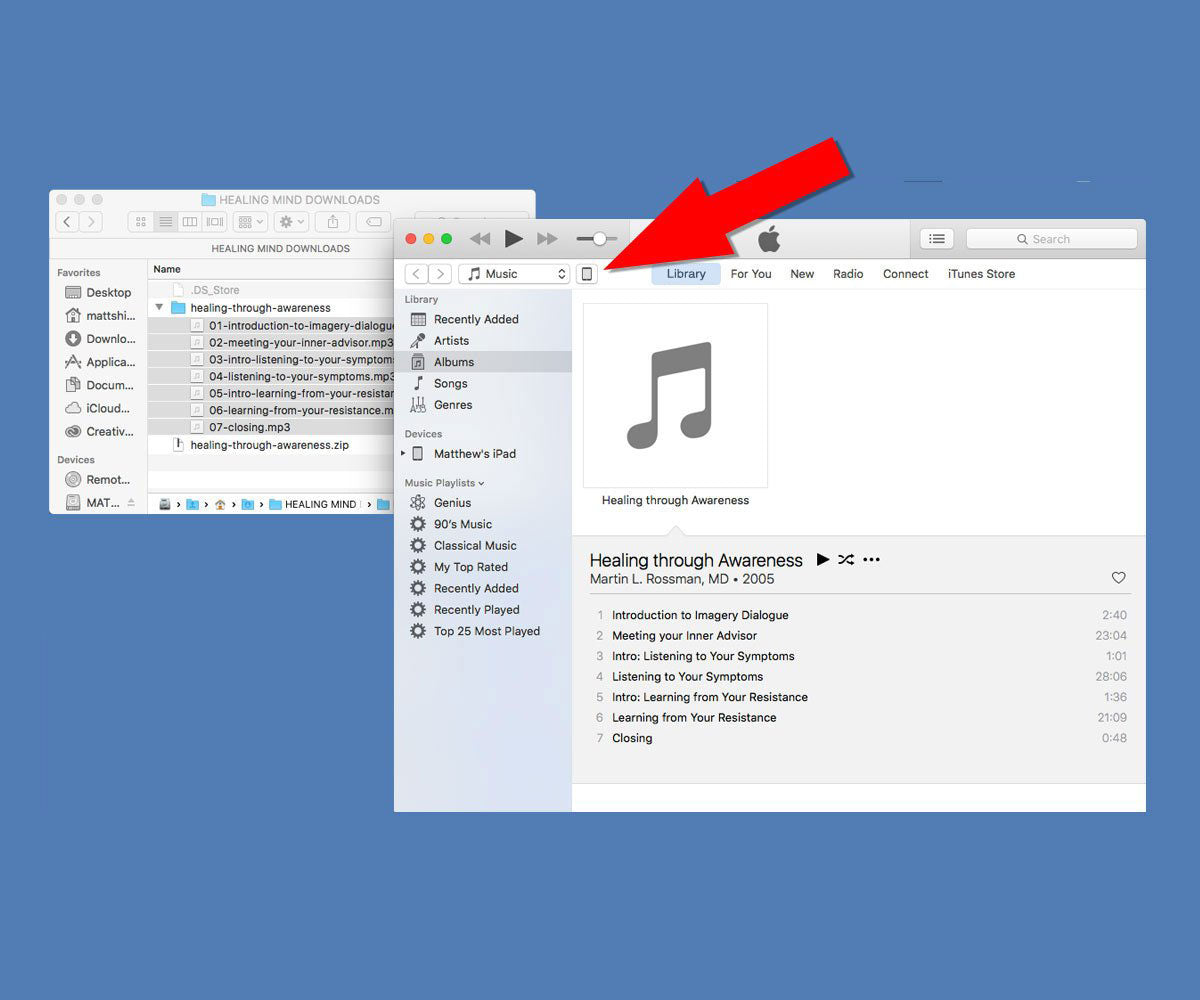
Now that the audio files have been dragged into the "Library" section of iTunes®, click on the Device Icon to access your mobile device.
Step 7
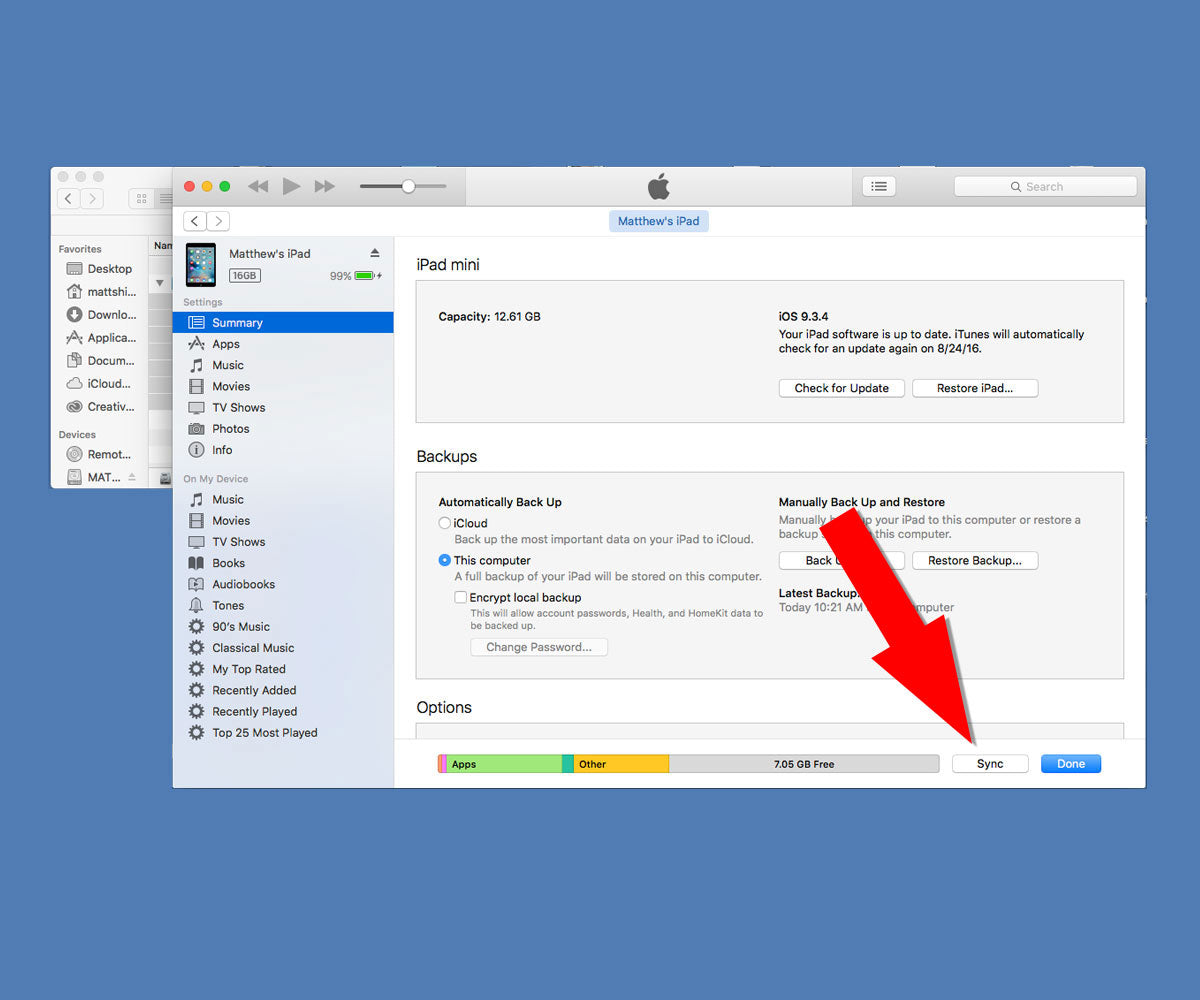
Now you will need to "Sync" your mobile device to access the audio files that were dragged into iTunes®. Click on the "Sync" button as shown. This may take a couple moments.
Step 8
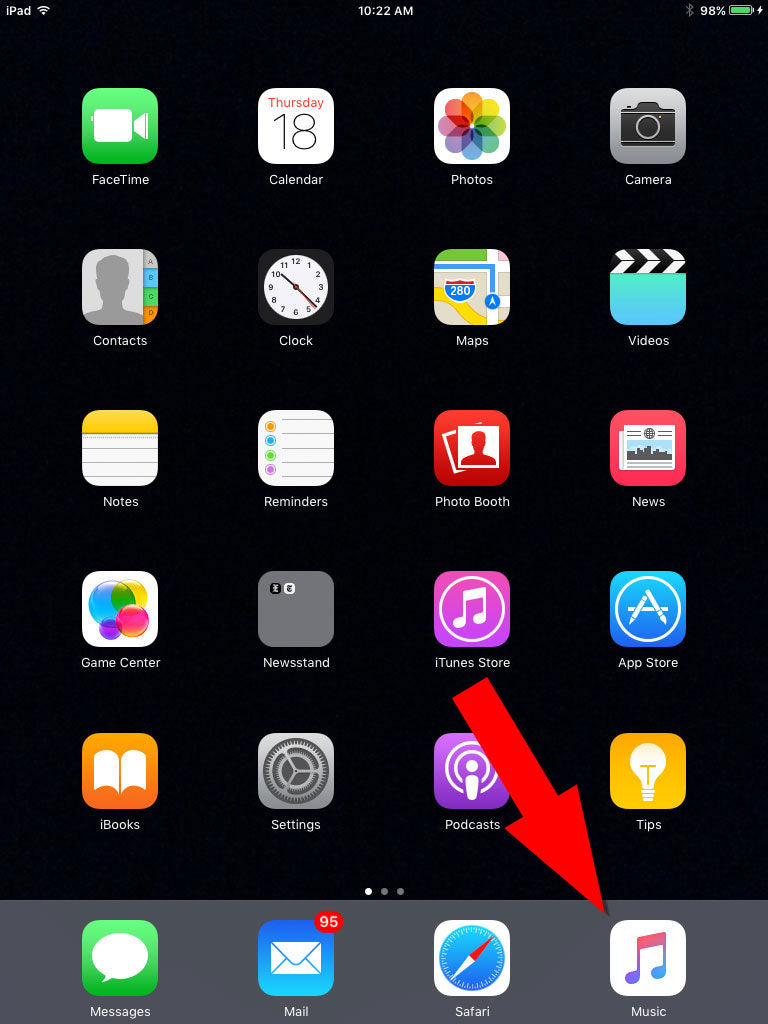
After the Sync is complete, navigate to the "Music" app on your mobile device.
Step 9
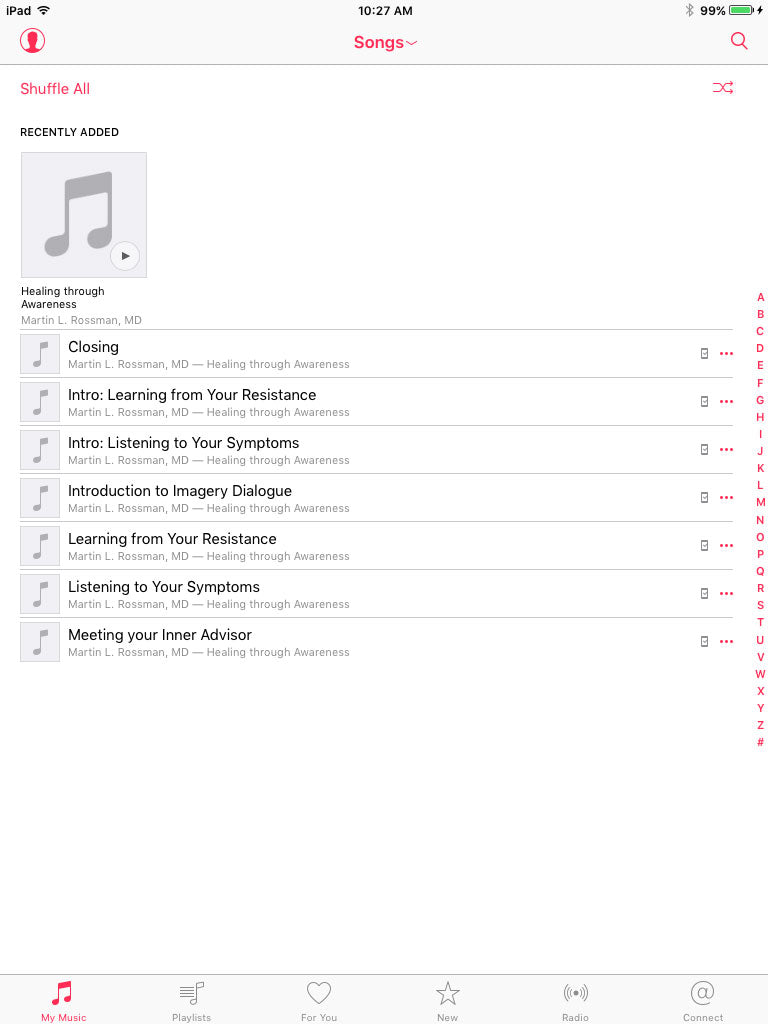
All your downloaded and synced audio files should now be shown as "songs" on your mobile device.
